Converting to Monochrome....
disclaimer, all images from Google images...
Monochrome simply means ‘of one color’
This image would be black and white, as the pixels are EITHER black or white, there are no "tones"

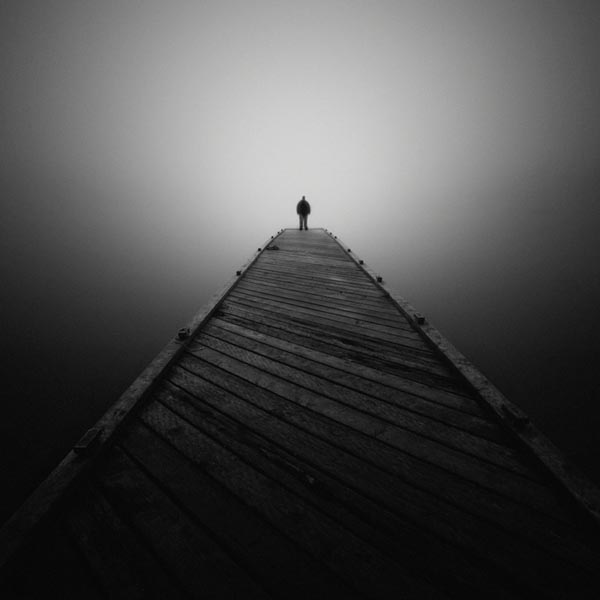
Very rarely in photography do we want a truly black and white image, silhouettes can be an obvious exception. Usually we want our image to be various shades of black.

Some camera can capture a monochrome image SOOC, but I prefer the control of using the BW adjustment layer

Below are a few different ways (Faststone, Picassa, PS, Elements) to convert images to black and white or monochrome. monochrome should only have one color, white and then shades of one color, shades of gray is the most common (BW) but shades of tan (sepia) or blue or another color can be done as well.
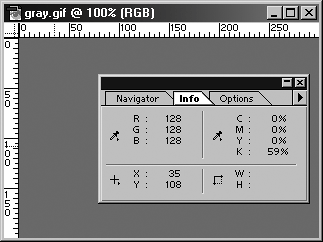
There are plugins (Nik SilverEfex and Topaz BW effects, but please note that some of these plugin presets yield color, not monochrome images. Monochrome images typically have color values that are the same for R G and B. You can view info in Photoshop and use the eye dropper and see if your image has the same
A VERY good way to convert is using the black and white adjustment layer in PS, it is non-destructive and gives you a lot of control over your final image.
1. black and white adjustment layer ***
Available in Photoshop CS 3 onwards, the black and white adjustment layer gives you all the control of the channel mixer and twin hue/saturation techniques via six colour sliders. But the most exciting feature is it's ‘targeted adjustment tool'. With this tool you can stroke tones in your photo to make them lighter or darker. It's an intuitive and precise conversion technique.
Photshop CS 3 and onward, nondestructive:
- Click the Black White icon in the Adjustments panel.
- OR Layer --> New Adjustment Layer --> Black and White
- Click ‘OK'. The Black and White toolbox appears:
- black and white conversion photoshop
- Move the six color sliders right or left to brighten or darken the respective tones in the photo. You can also choose from from the presets in the drop down menu at the top.
- Move the cursor over the photo and hold the left mouse button down. The cursor changes, indicating that the targeted adjustment tool is activated. With the mouse button held down, move the mouse to the right to lighten the tones under the cursor, or left to darken them.
- Click ‘OK' when you're done.
2. Graysale
The simplest black and white conversion method, converting to grayscale discards all the color information in the photo.
This is destructive, it is easy but I do not recommend this method.
Photoshop CS 3 and onward:
Image --> Mode --> Grayscale
Click ‘Discard'
Photoshop Elements:
Image --> ; Mode --> ; Grayscale
Click ‘OK'
Pros: Quick and easy.
Cons: You have no control over the conversion. Destructive. !
3. Hue/Saturation
This method gives exactly the same result as converting to grayscale. The only advantage is that it's available as an adjustment layer, and can be used as part of a non-destructive editing process.
Photoshop CS 3 and Photoshop Elements:
Layer --> New Adjustment Layer --> Hue/Saturation
Click ‘OK'
Move the saturation slider all the way to the left (-100) and press ‘OK'
Pros: Quick and easy; can be applied as an adjustment layer in both Photoshop CS 3 and Elements 6.
Cons: You have no control over the conversion.
4. LAB Color Method (Destructive)
This technique converts your photo from RGB mode to Lab mode, which records the brightness and color values separately, then discards the color information leaving a black and white image. It's not available in Photoshop Elements.
Photoshop CS 3 and later:
Image > Mode > Lab Color
Go to the Channels window if it's already open (if not go to Window > Channel) and select the Lightness channel
Image > Mode > Grayscale
Click ‘OK'
Pros: Gives a better black and white conversion than the convert to grayscale and hue/saturation methods.
Cons: Destructive editing process that doesn't give you much control.
5. B&W Conversion in Picasa
Open image in Picasa
Select the “Effects” tab for B&W
Click on B&W
Use the “Undo” button at bottom of every screen to go back, or use Picture; Undo All Edits
Select the “Tuning” tab to adjust Shadows, Highlights of Fill Light (Zoom in to enlarge view)
Select the “Basic Fixes” tab to auto-adjust Contrast or to Crop
File; Save places original in a new sub-folder and saves the altered image in original folder with
the same name
To Resize for Digital Submission: File > Export Picture to Folder > Select Folder Resize 1024
OR 768; Image Quality “Maximum”; Export
Picasa creates a subfolder with the resized image
6. B&W Conversion in FastStone
Open in FastStone Image Viewer
Press Enter to toggle Large View on/off
On left side of screen, select Grayscale or Sepia
On left, select Enhance Colors to adjust Contrast, Tint, & Brightness
On left, select Crop Board to crop
For Printing: Save As; (Picture Name_BW.jpg); Quality 100
For Digital Submission: On left: Resize/Resample; Standard > 1024x768
Save file, 100 quality
http://graphicdesignjunction.com/2013/01/beautiful-monochrome-landscapes-photography/